
TOC - Desktop User Guide

Download
Click here to download TOPS Office Communicator (TOC)
Installation
Windows
- Launch the downloaded executable.
- Follow on screen steps.
- Once complete, open the newly installed application.
MacOS
- Launch the downloaded executable.
- Follow on screen steps.
- Once complete, open the newly installed application.
First Time Login
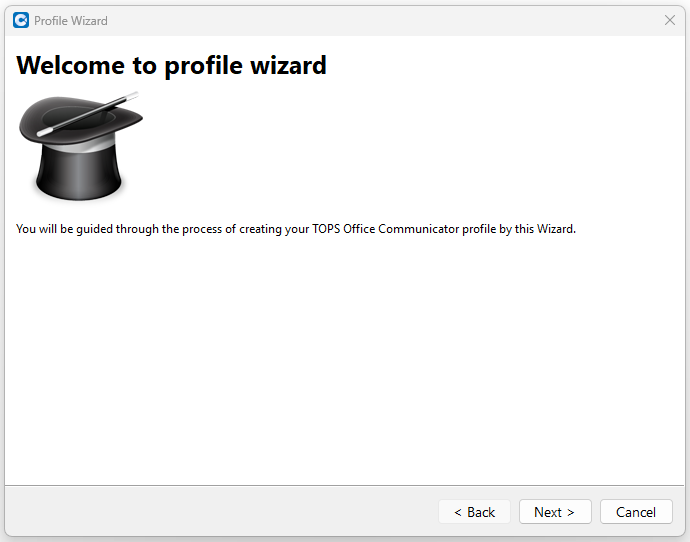
Once you launch the application for the first time, you will be prompted with the Profile Wizard:
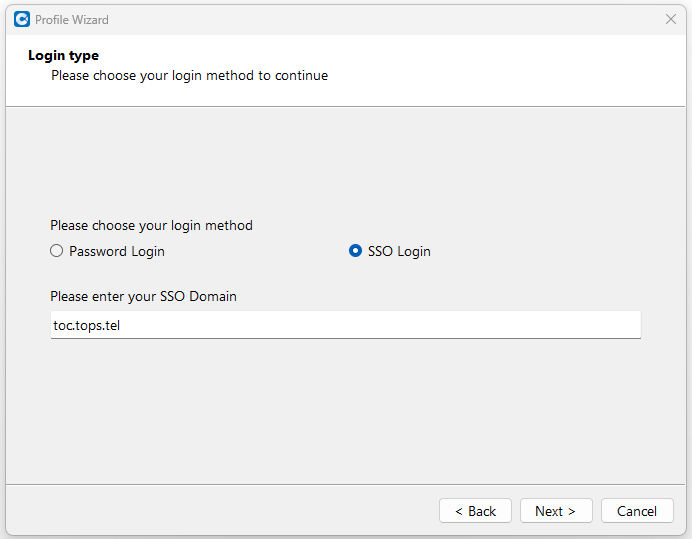
Press Next button and select Password Login or SSO Login.
If you select SSO login, you will be prompted to enter the SSO domain:
toc.tops.tel
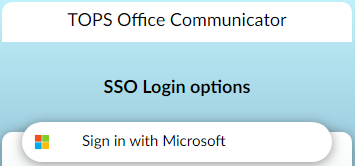
Press Next button, and select Sign in with Microsoft:
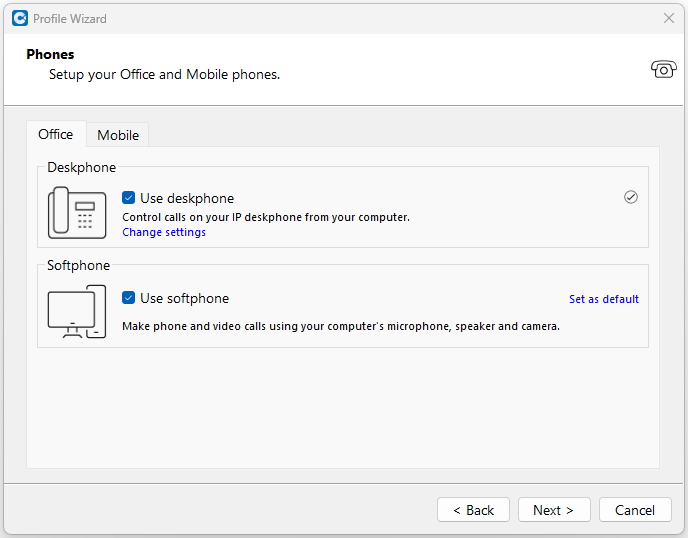
In the Phones window, accept the default settings and press Next:
In the final screen, press Finish.
The next time you open TOC, you should be logged in automatically.
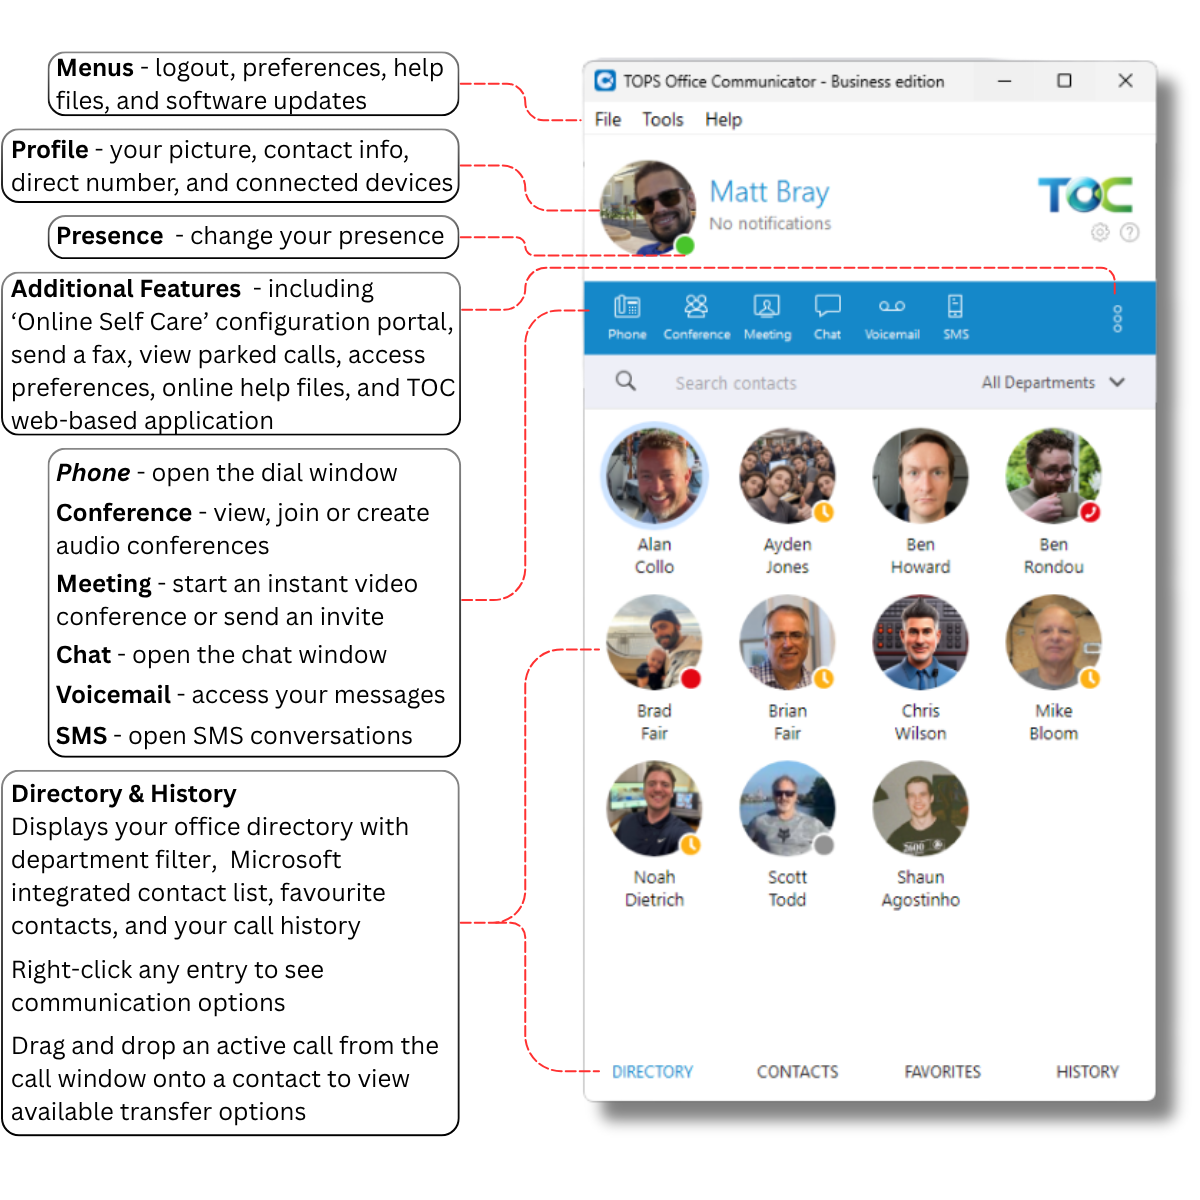
TOC Interface Overview
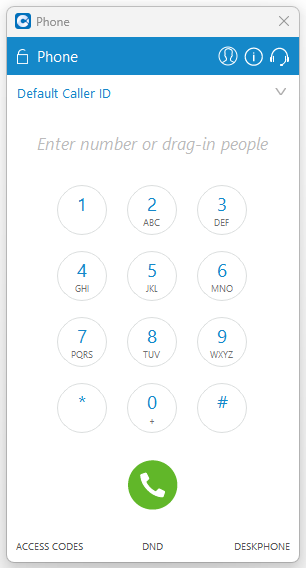
Make a Phone Call
Click on the phone icon beside any contact, or click on the main Phone icon and enter a number in the dial pad.
Softphone Mode
In the Phone window, or in Preferences, you can change your default calling device from your desk phone to softphone or mobile.
Click on DESKPHONE at the bottom right and select your desired device.
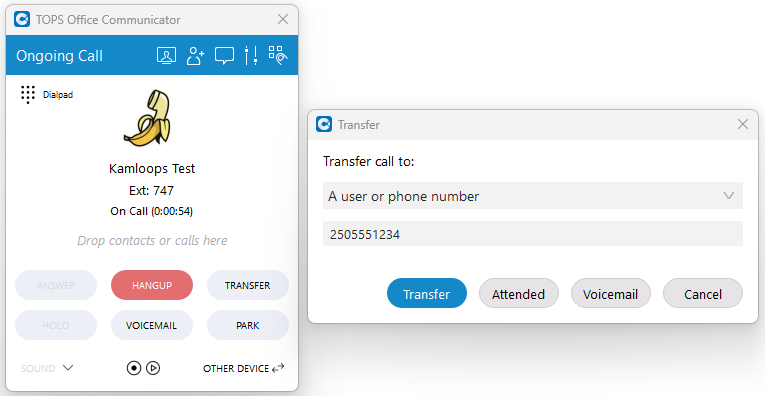
Transfer a Call
- Press the Transfer button inside the active call window.
- Type a contact name or enter a phone number in the Transfer window.
- Press Transfer to complete a blind transfer, Attended to initiate a consultative transfer, or Voicemail to send the call directly to the destination voicemail.
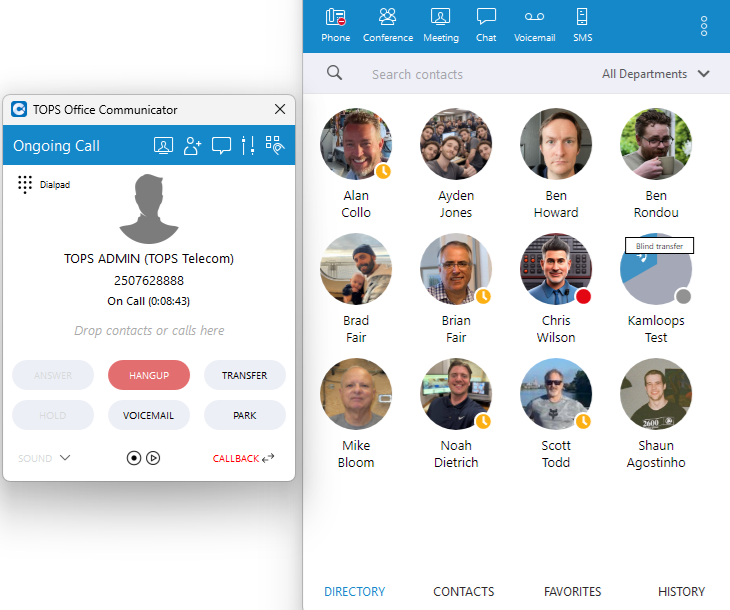
Drag-and-drop Transfer
You can also drag-and-drop an active call on top of a contact to transfer it.
- Click and hold the picture or icon of the caller.
- Drag-and-drop it onto any entry in your Directory, Contacts, or Favourites.
- Blind, Attended, and Voicemail transfer options are displayed when you hover over the contact entry.
Hold
To put a call on hold, press the Hold button.
To pick up a held call, press the Resume button.
When a call is put on hold, it can only be picked up by the person that placed it on hold. To put a call on 'hold' so that someone else can pick it up, use Park instead.
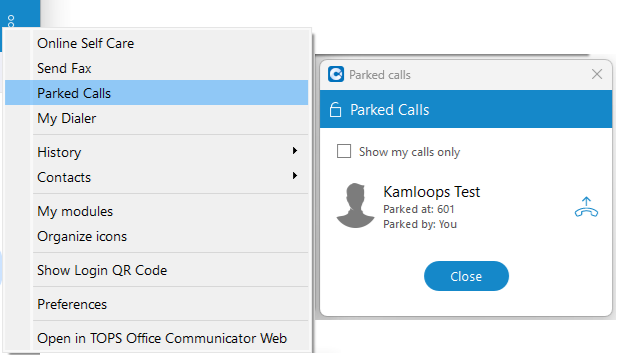
Park
To put a call on Park, press the Park button. An audio prompt with the Park number is played.
To pick up a parked call, dial the park number from any phone or TOC application - example: 601.
If a parked call is not picked up within the preset time limit, it will ring back to the user that parked it.
You can also view currently parked calls by selecting Parked Calls from the additional features menu.
Switch Device During a Call
You can switch your calling device during an active phone call by clicking on the Switch Device button inside the call window. The call will be transferred to the selected device.
Add People to an Existing Call
While on a call, press the Invite icon or drag-and-drop a contact into the call.

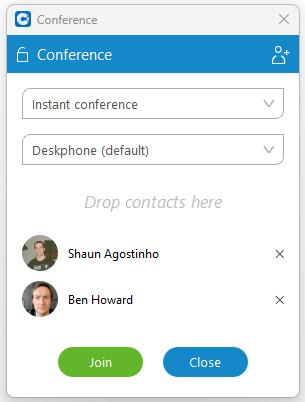
Start a New Conference Call
- Click on the Conference icon to bring up the Conference window.
- Select an existing conference from the drop down menu, or select Instant conference.
- Press the Invite icon or drag-and-drop contacts into the window to add them to the call.
- Press Join to initiate the conference.
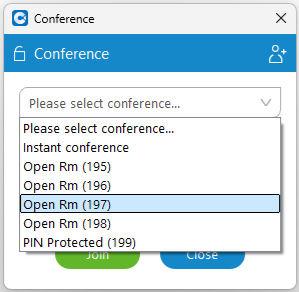
You can view your existing conference rooms from the drop-down in the conference window.
- Dial into them by selecting them and pressing Join, or by dialing their extension number (shown in brackets).
- Schedule a conference by telling other users to dial the same conference extension at the same time.
- Invite outside callers through the conference window, or by transferring them to the conference room extension.
- If you would like more conference rooms, or to change the PIN on protected rooms, contact TOPS support.
Voicemail
To view your voicemail messages, click on the Voicemail icon.
Click on a message to show the play button.
Right-click on a message to save it to old messages folder, delete it, or call the person back.

Access your Mailbox
To access your mailbox from TOC, follow these steps:
- Click on the Phone icon and press Access Codes > Voicemail, or dial *86.
- Enter your PIN - found in your TOC welcome email.
To access your mailbox from your desktop phone:
- Press the Voicemail touch key.
- Enter your PIN.
To access your mailbox from another desktop phone:
- Dial *84 + your extension number.
- Enter your PIN number.
Record Your Name for the Directory
- Access your mailbox by following the steps above.
- At the main menu, press 0 for mailbox options.
- Press 3 to record your name.
- At the tone, say only your first and last name - press # when finished.
- Press 1 to accept, 2 to review, or 3 to re-record.
Record Your Personal Greetings
- Access your mailbox by following the steps above.
- At the main menu, press 0 for mailbox options.
- Press 1 to record your Unavailable message.
- When you are finished recording, press #.
- Press 1 to accept, 2 to review, or 3 to re-record.
Example greeting:
This is Matt with TOPS. I'm not available to take your call right now. If you require immediate assistance, please press 0, otherwise, leave a detailed message and I will return your call.
Change Your PIN
- Access your mailbox by following the steps above.
- At the main menu, press 0 for mailbox options.
- Press 5 to change your password.
- Enter your new PIN, followed by # key.
- Enter it again for confirmation, followed by # key.
Listen to Your Voicemail Greeting
Listen to your current voicemail greeting by calling your mailbox directly:
- Dial *85 + your extension number.
Company Greetings
For security reasons, instructions to change company greetings are not provided on our website. We will provide instructions to authorized users upon request.
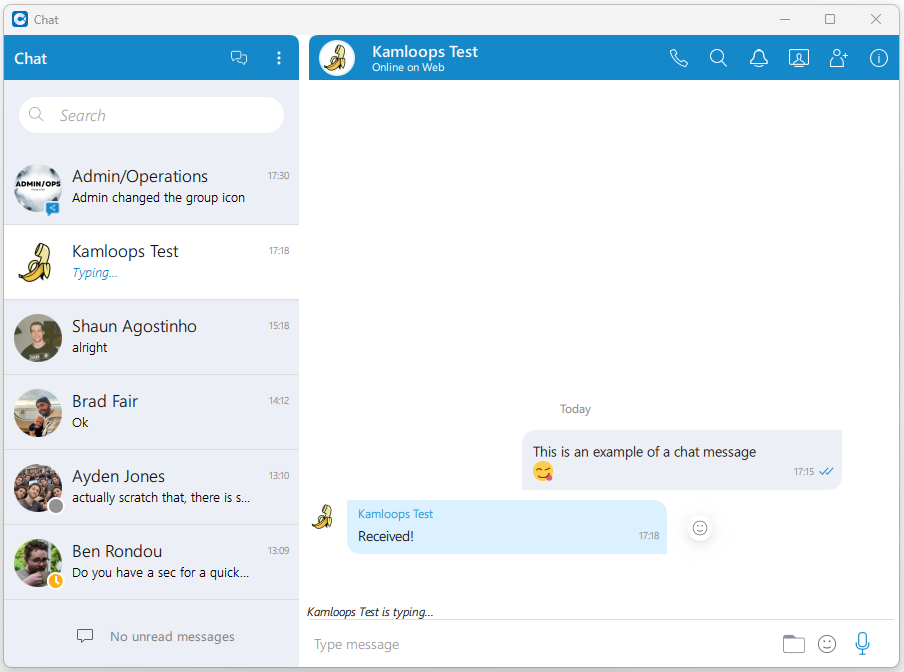
Chat
Chat is an instant messaging platform for all desktop, mobile and web users. All chat messages are stored on the TOC server and synced across all your TOC applications. Chat is fully encrypted from end-to-end.
In Chat, you can:
- Send and receive direct messages to other users
- Create and participate in group chats with other users
- Send emojis, voice recordings, and transfer files (with drag-and-drop)
- Initiate a phone call or meeting with video and screen sharing
Click on the Chat icon to open the Chat window.
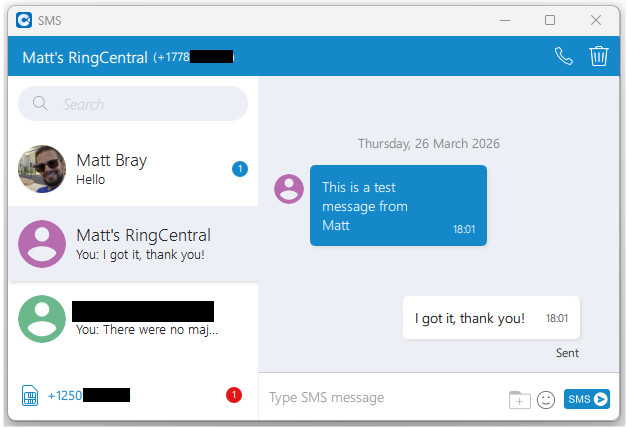
SMS Messaging
SMS allows you to send and receive SMS text messages and MMS picture messages to any cellphone number in Canada. All messages are sent and received through your direct phone number which is visible at the bottom left.
Click on the SMS icon to open the SMS window.
Unified Presence
Show your availability to all TOC desktop and mobile users in your company by setting your presence. You can set your presence from any TOC app, and you can sync it with your Outlook or Microsoft Teams calendar. Custom rules can reroute your calls based on your presence status.
- Click on the circular icon beside your picture to access the presence menu.
- Select any presence status or click on Custom status...
- In the popup window, select how long you would like your presence to appear before switching back to Available.
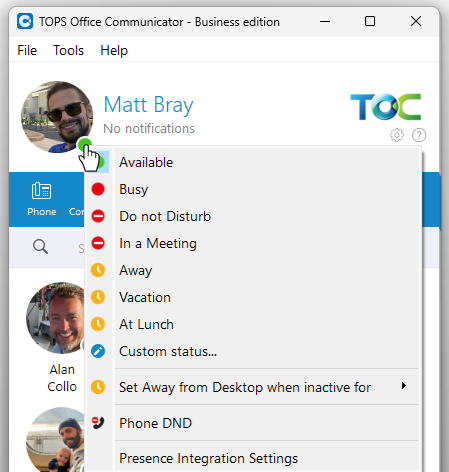
Default Presence Status Behaviour
Busy / Do not Disturb / In a Meeting - You receive all phone calls, chat messages, and other notifications - functionally the same as being Available.
Away / Vacation / At Lunch - Chat notifications on your cellphone are muted. Other notifications still come through.
Phone DND - Turn this on to send all phone calls directly to your voicemail.
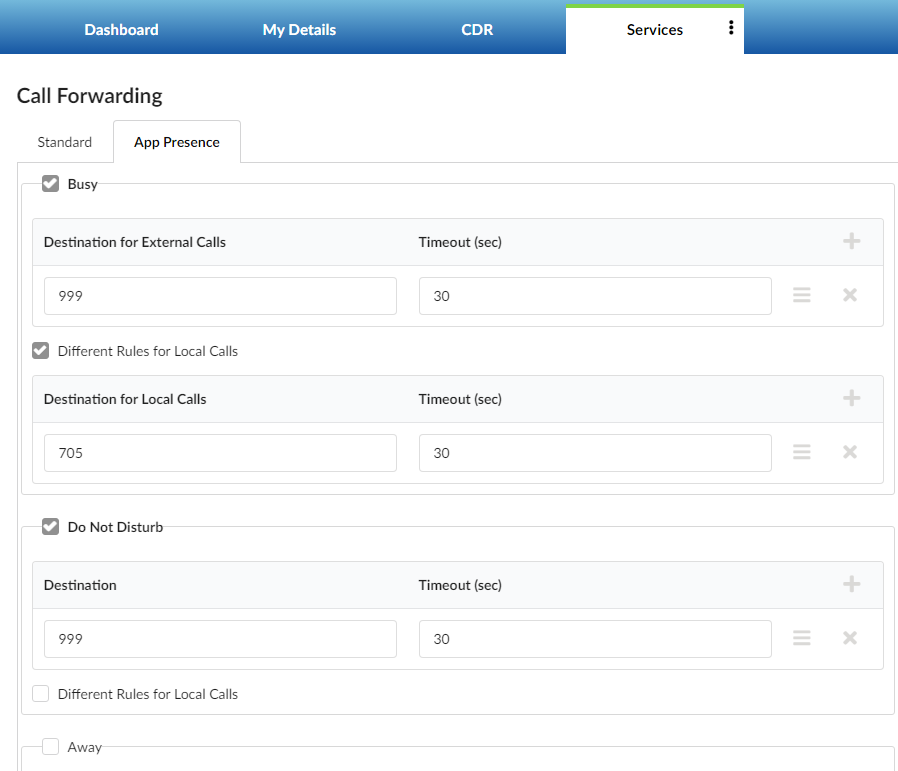
Custom Rules
You can create custom rules in the 'Online Self Care' configuration portal, or TOPS support can create them for you.
- Open the Online Self Care portal from the menu in your TOC app.
- Click on Services.
- Click on the edit icon beside Call Forwarding.
- Click on the App Presence tab.
- Check off each presence that will apply a custom call routing rule.
- Click on the + button beside each Destination / Timeout line to add a new destination.
- (Optional) enable Different Rules for Local Calls.
Common destinations:
- 999 - send the call direct to your voicemail
- <Your Extension Number> - ring your extension
Presence Calendar Integration
In the presence menu, or in TOC preferences, click on Presence Integration Settings, and then click on the Outlook tab to enable Presence - Outlook Calendar Integration.
Presence status - select whether to follow the settings in your Outlook calendar appointment or always apply the same Presence during calendar events.
Presence description - a message entered in this field will be displayed whenever TOC changes your presence due to a calendar event.
Under Choose which calendars you want to track, the top listed Calendar is usually your primary one. Others may appear based on your Outlook settings.
TOC must be running for Outlook sync to take place.

Meetings
In TOPS Office Communicator, meetings are video conferences. Features include:
- Meeting chat with emojis and reactions
- Multi-media presentations and screensharing
- Recording capabilities
- Blurred backgrounds and other effects for participants
Meetings are available in two options: Meeting Starter and Meeting Platinum.
Meeting Starter is included with all TOC licenses and allows meetings of up to 10 participants with a 45 minute time limit. Designed for internal collaboration and screensharing.
Meeting Platinum is included with Platinum user licenses and allows meetings of up to 100 participants, no time limit, and a dedicated dial-in phone number.
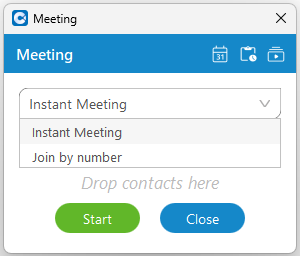
Start a Meeting
Click on the Meeting icon to bring up the Meeting window. Choose between creating an instant meeting or joining a meeting in progress.
You can also start a meeting with an internal user inside the chat window.
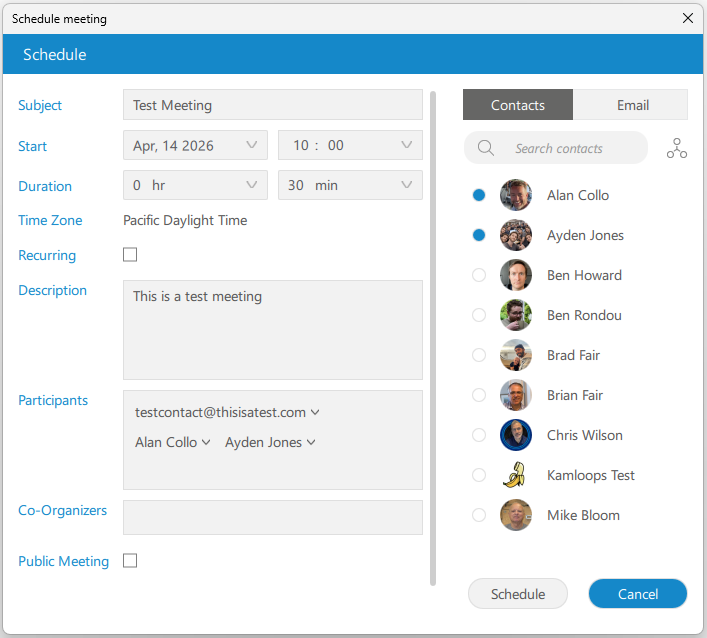
Schedule a Meeting
Click on the calendar icon in the Meeting window to schedule a meeting. Fill in the meeting details and add the desired users and external participants.
When you click schedule, an invitation email and calendar reminder will be sent to all participants including yourself. The invitation includes instructions for external users to join.
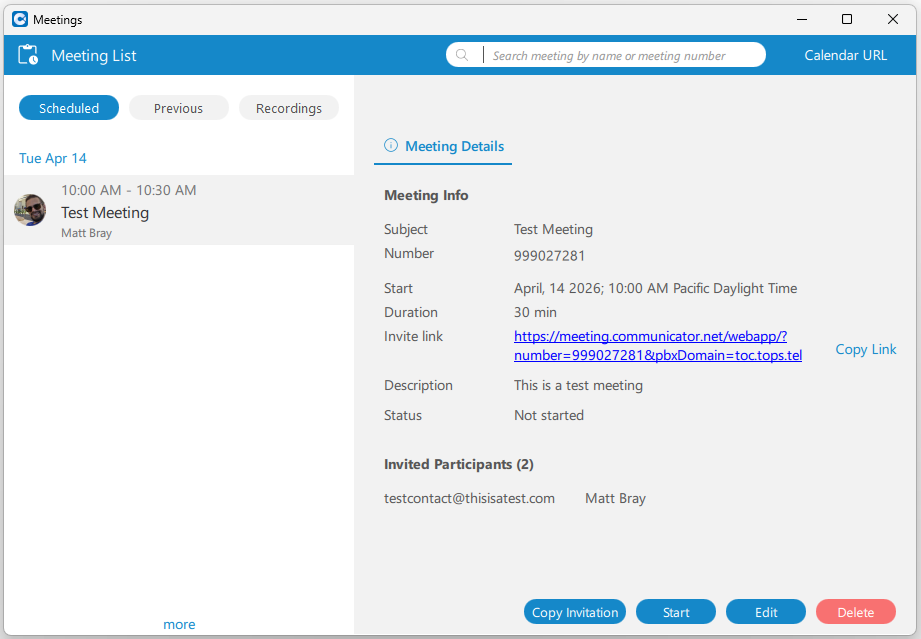
In the meeting window, click the Meeting List icon to see future scheduled meetings and adjust settings, add participants, or send a cancellation.
Go to our guide on TOC Meetings to learn about meeting settings and controls - coming soon!
Faxing
work-in-progress
Preferences
work-in-progress