
How to Enable Your Headset (Audio & Microphone) on a Remote Desktop Connection

If you're using a headset for voice calls (e.g. Teams, Zoom, Discord) while connected to a remote desktop, you may notice that your microphone or audio isn't working. This guide walks you through how to fix that.
Before You Start
Make sure your headset is plugged in and working on your local computer before connecting to the remote desktop. You can test this by opening Sound Settings on your local PC and checking that your headset shows up as an input and output device.
Part 1: Configure Your RDP Client Settings
These steps are done on your local computer before you connect.
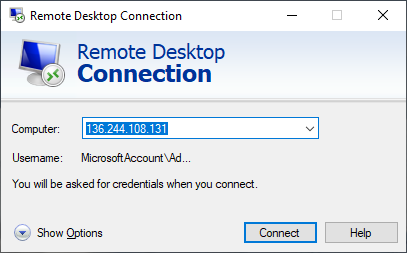
Step 1 — Open the Remote Desktop Connection App
Search for Remote Desktop Connection in your Windows Start menu and open it. Before connecting, click the Show Options button at the bottom-left of the window to expand the settings.
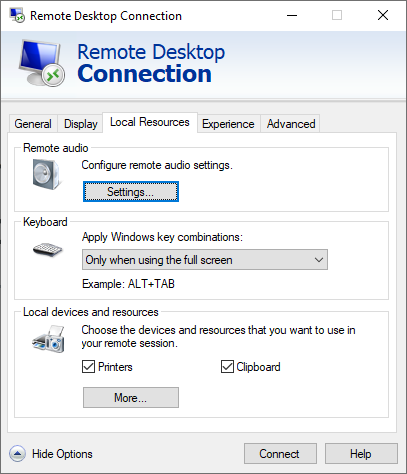
Step 2 — Go to the Local Resources Tab
Along the top of the expanded window, click the Local Resources tab. Under the Remote audio section, click the Settings... button.
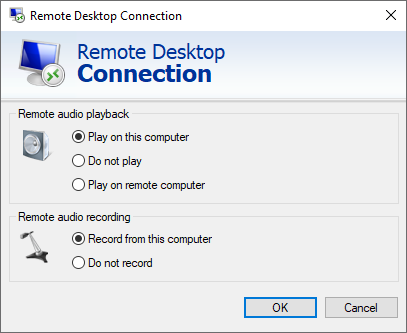
Step 3 — Enable Audio Playback and Microphone Recording
In the Remote Audio settings window:
- Under Remote audio playback, select Play on this computer.
- Under Remote audio recording, select Record from this computer.
Click OK to save, then connect to your remote desktop as usual.
Tip: After connecting, check your voice application (Teams, Zoom, etc.) and look for a device called Remote Audio in the audio input/output settings. Select it if it isn't already chosen.
Part 2: Server-Side Setup (If Audio Still Doesn't Work)
If you've completed Part 1 and your headset still isn't detected, the remote server may need some additional configuration. These steps are performed on the remote desktop itself and may require administrator access.
Step 5 — Open Server Manager
Once connected to the remote desktop, open Server Manager (it usually opens automatically on login, or you can search for it in the Start menu).
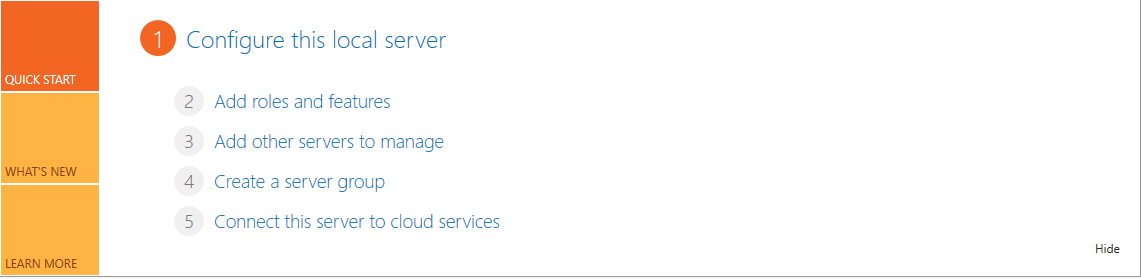
Step 6 — Add Roles and Features
In Server Manager, click Add roles and features under the Configure this local server section. This opens a setup wizard.
Step 7 — Walk Through the Wizard
- On the Installation Type screen, choose Role-based or feature-based installation and click Next.
- Select your server from the list and click Next.
Step 8 — Enable Remote Desktop Services
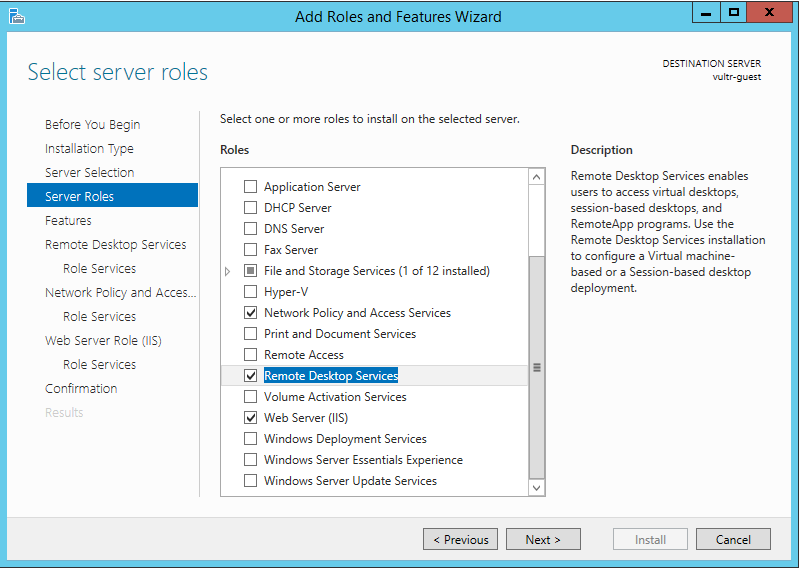
On the Server Roles screen:
- Find and check the box for Remote Desktop Services.
- Click Next to continue.
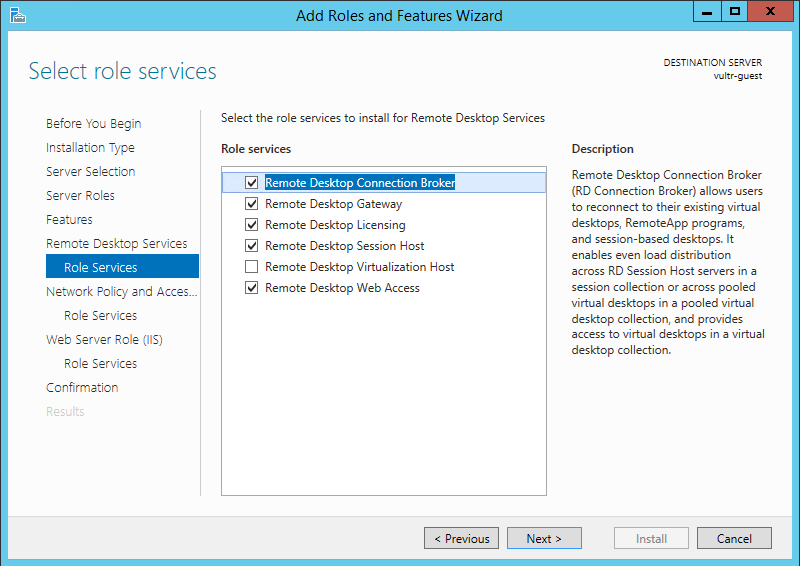
Step 9 — Select the Required Role Services
When prompted to choose which Remote Desktop role services to install, enable the following:
- Remote Desktop Session Host
- Remote Desktop Connection Broker
- Remote Desktop Gateway
- Remote Desktop Web Access
Click Next until you reach the Install button, then click Install. Once the installation finishes, restart the server.
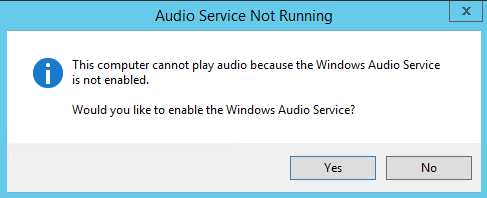
Step 10 — Enable the Windows Audio Service
After the server restarts and you reconnect, check the sound icon in the taskbar (bottom-right corner of the screen). If it has a red X on it, right-click the icon. Windows will ask if you'd like to enable the Windows Audio Service — click Yes.
You're All Set
Your headset's audio and microphone should now work through the remote desktop connection. If you open your voice application, you should see Remote Audio available as a device for both input and output.
Troubleshooting
| Problem | What to Try |
|---|---|
| No sound at all | Double-check that Play on this computer is selected in your RDP audio settings (Step 4). |
| Microphone not detected | Make sure Record from this computer is enabled (Step 4). |
| "Remote Audio" device not showing up | The server may need the roles and features installed (Steps 5–9). |
| Sound icon shows a red X after reboot | Right-click the sound icon and enable the Windows Audio Service (Step 10). |
| Audio cuts in and out | This can be caused by a slow internet connection. Try closing other bandwidth-heavy applications. |
If you need further assistance, please contact your IT support team.